


.avif)


 Step-by-step instructions
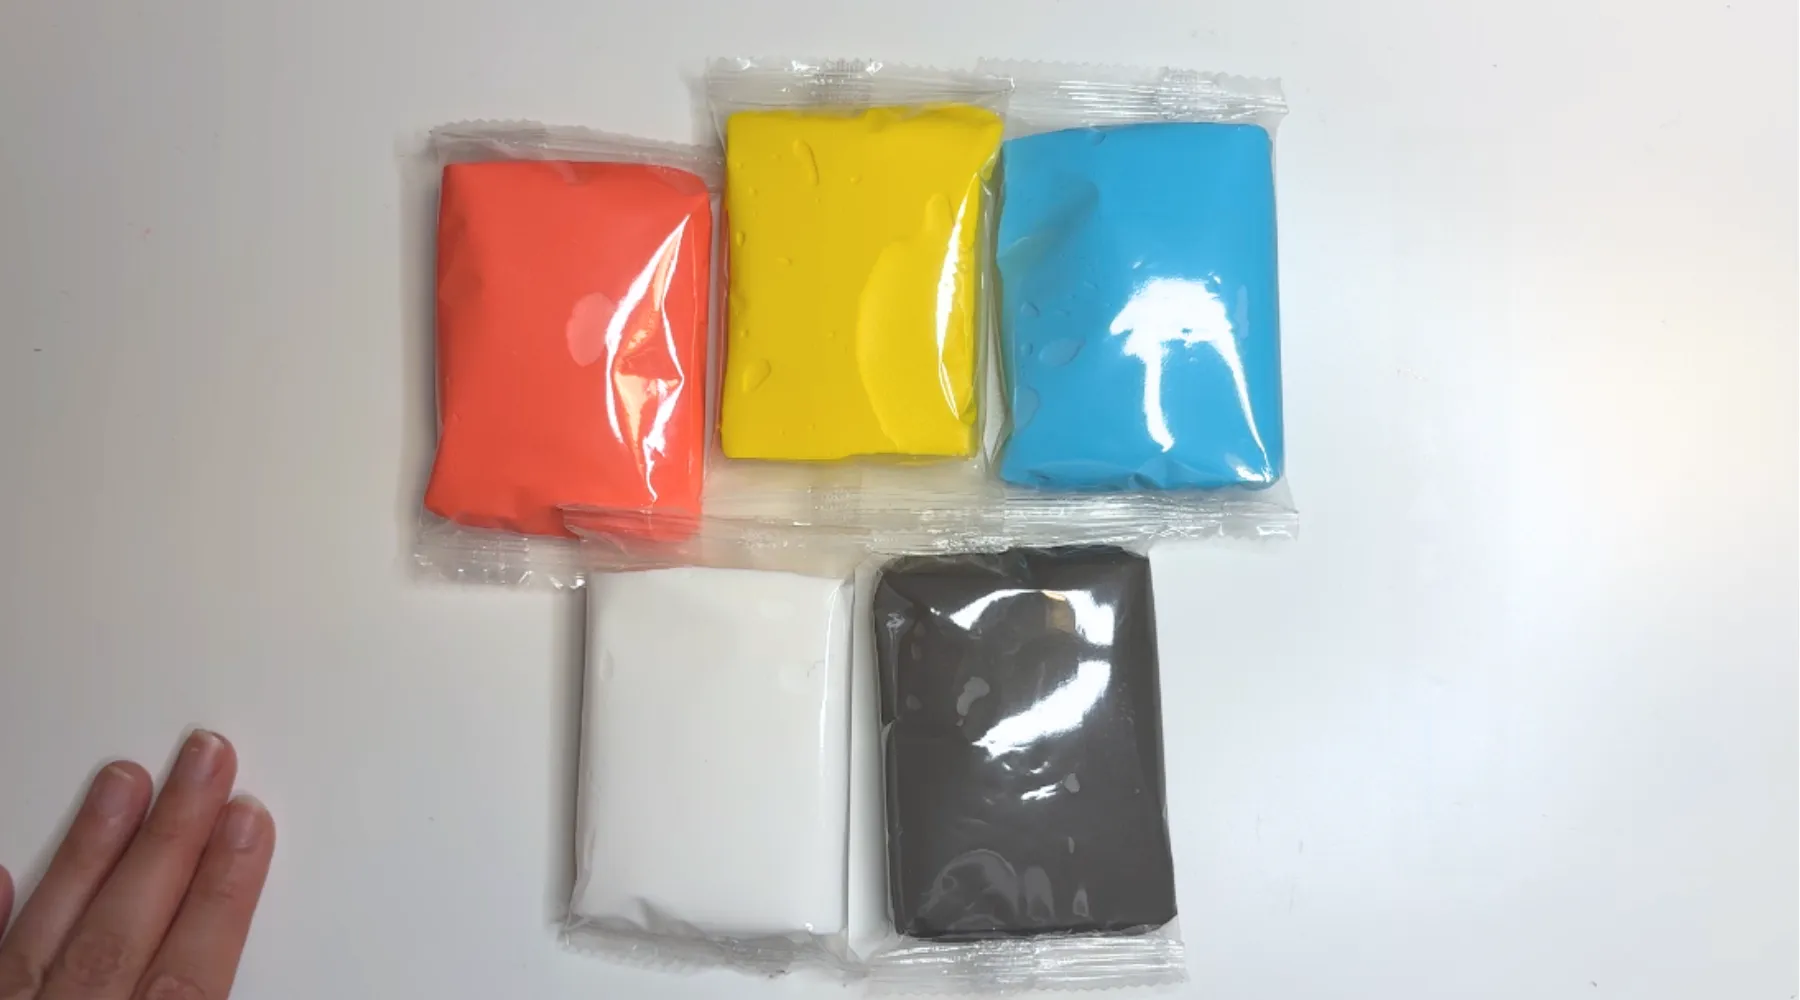
Step 1
Identify blue, red, yellow, gray and white clay.
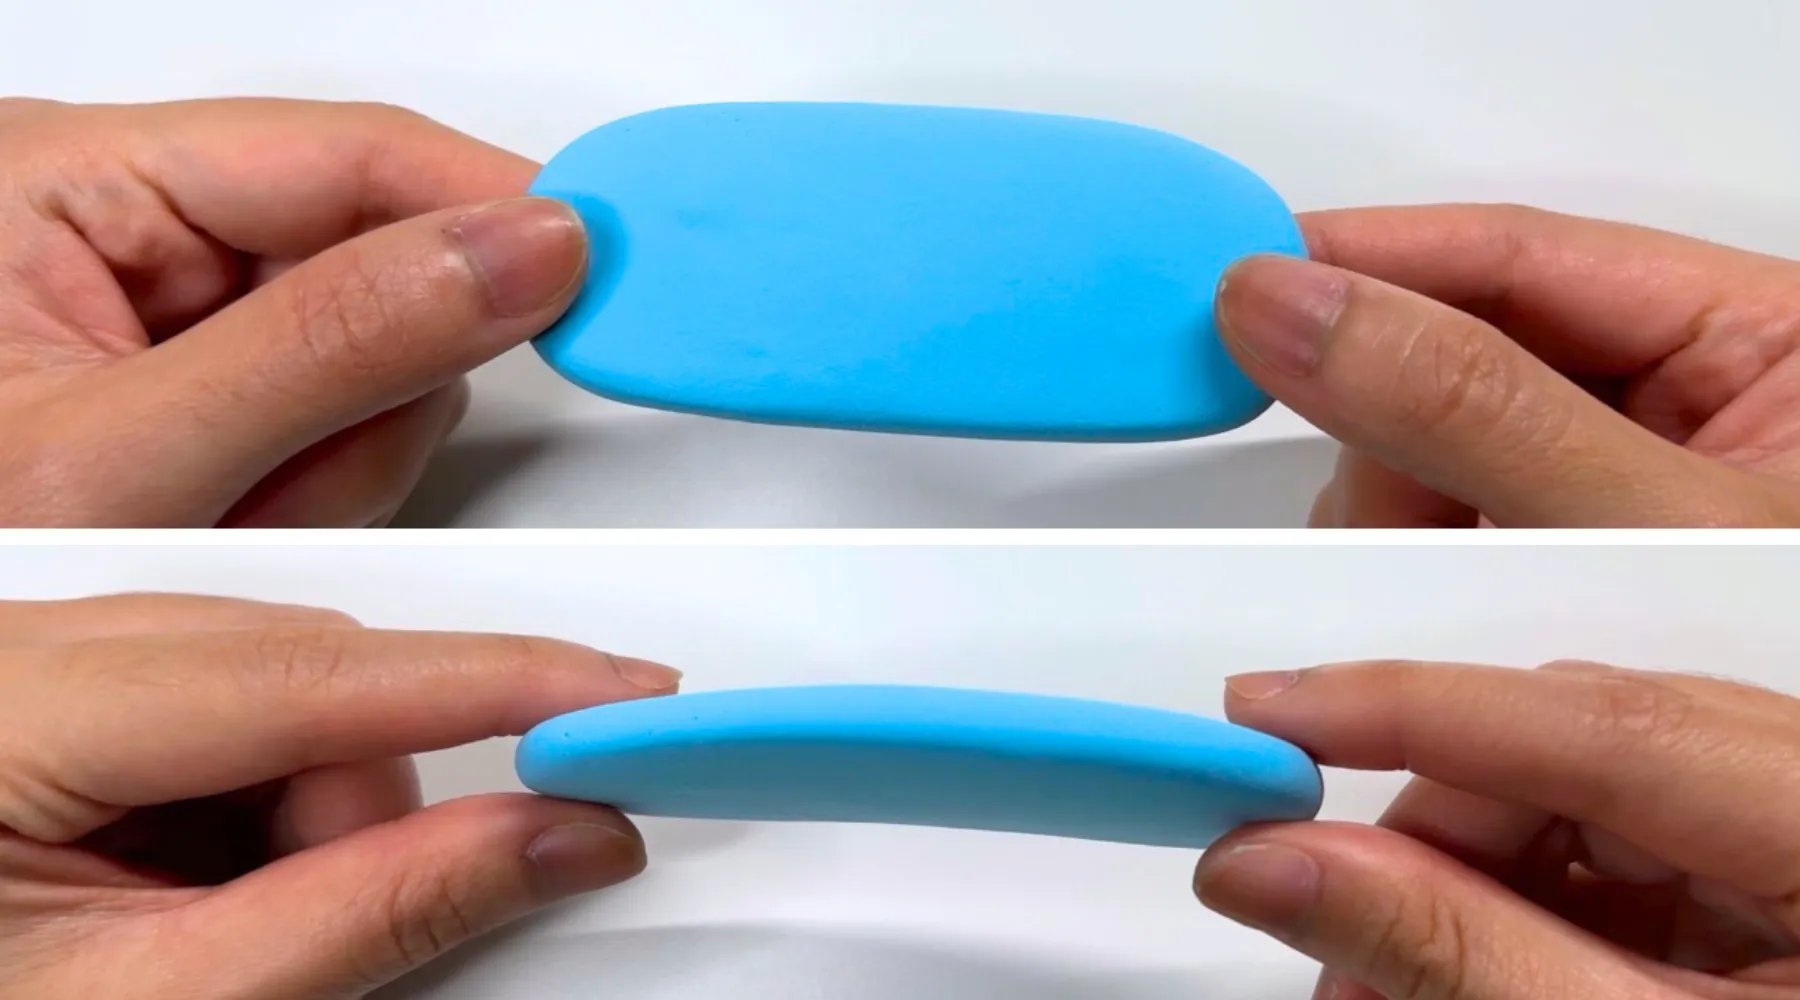
Step 2
Make the outer part of the rainbow using the blue clay. Shape a log and flatten it into a slab.
Tip: Stretch and knead the clay to remove wrinkles and unevenness

Step 3
Make the middle part of the rainbow using the red clay. Make a slab similar to step 1, except the red clay should be thinner than the blue clay.

Step 4
Place the blue clay on top of the red clay.
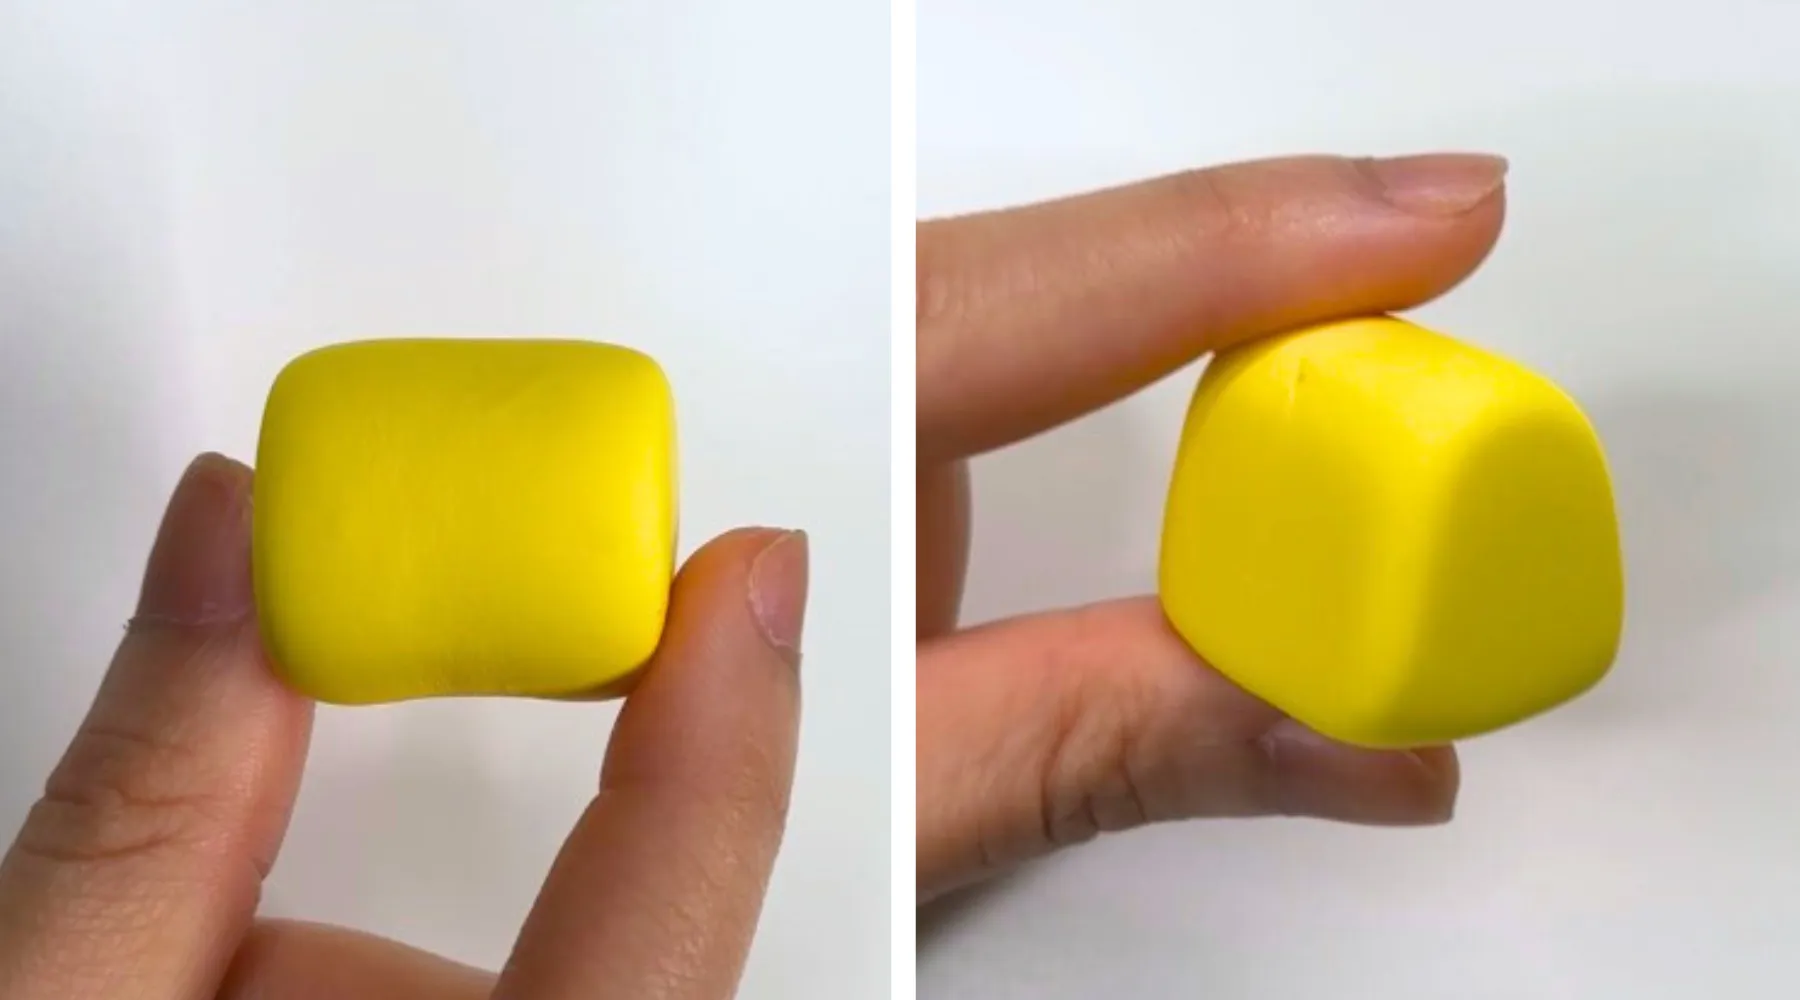
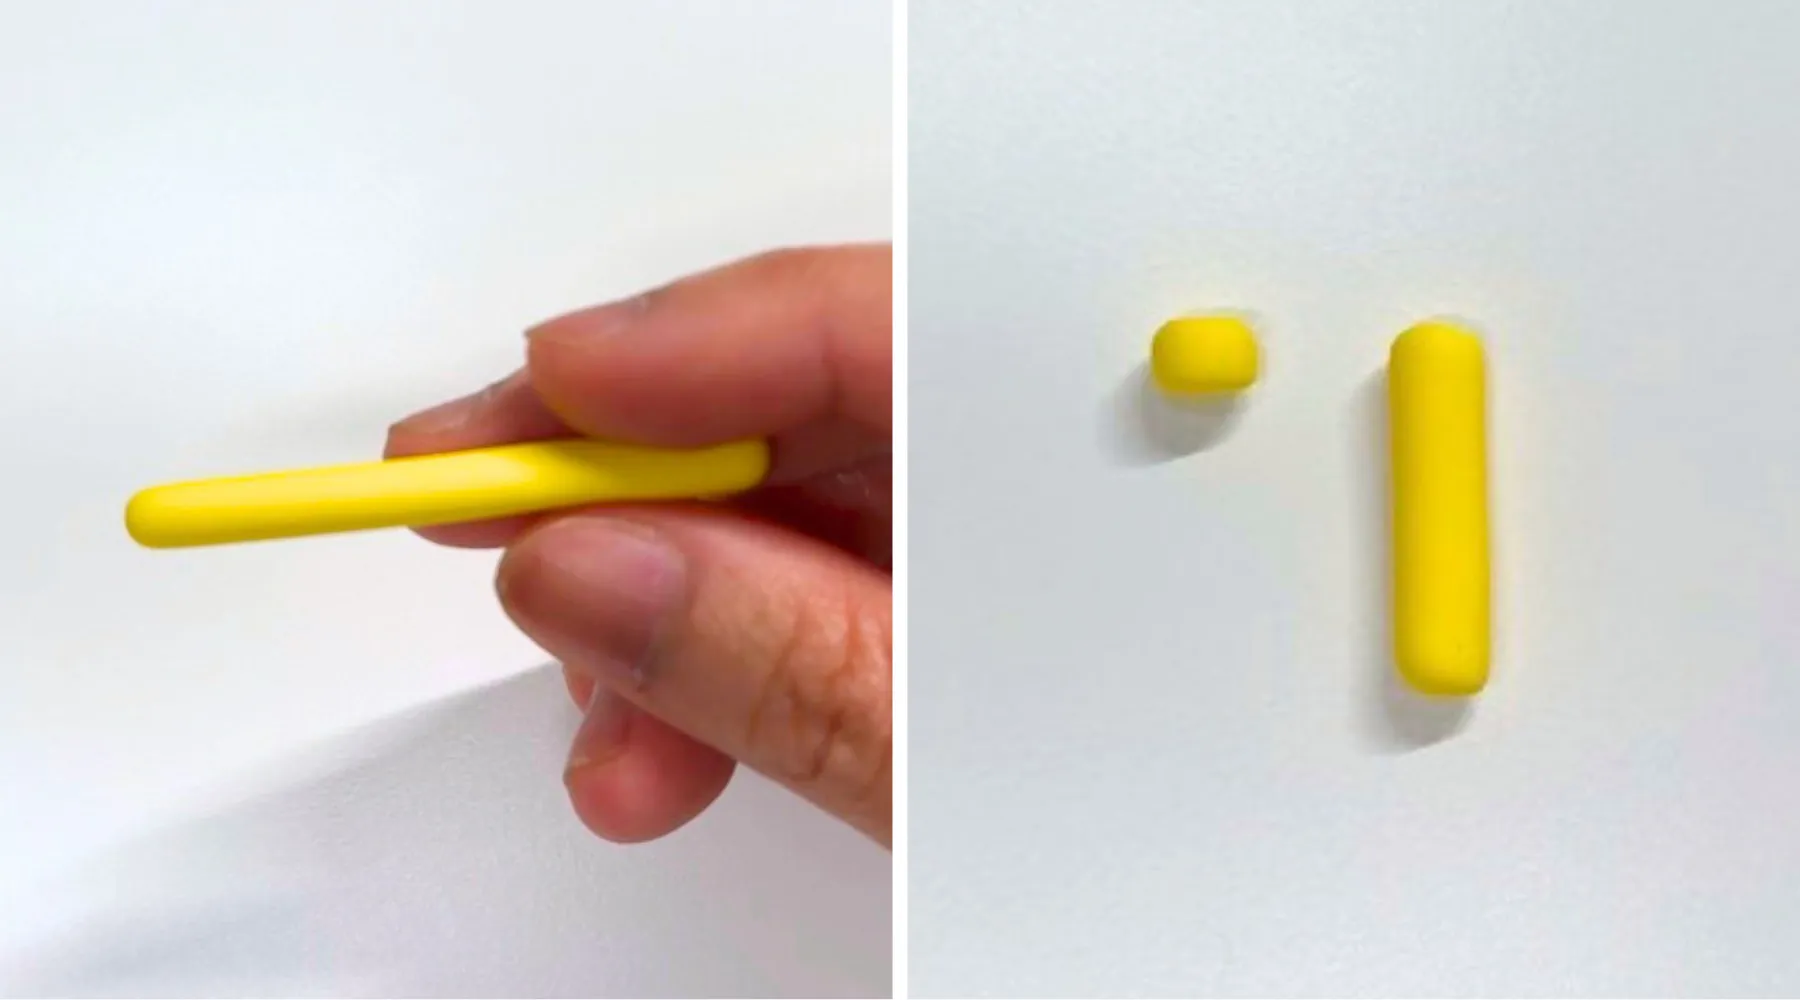
Step 5
Shape a cylinder using the yellow clay and make sure its height matches the width of the slabs. Use the table surface to gently flatten one curved side of the cylinder — this will create the arched base shape for the clay logo. Refine the sides.
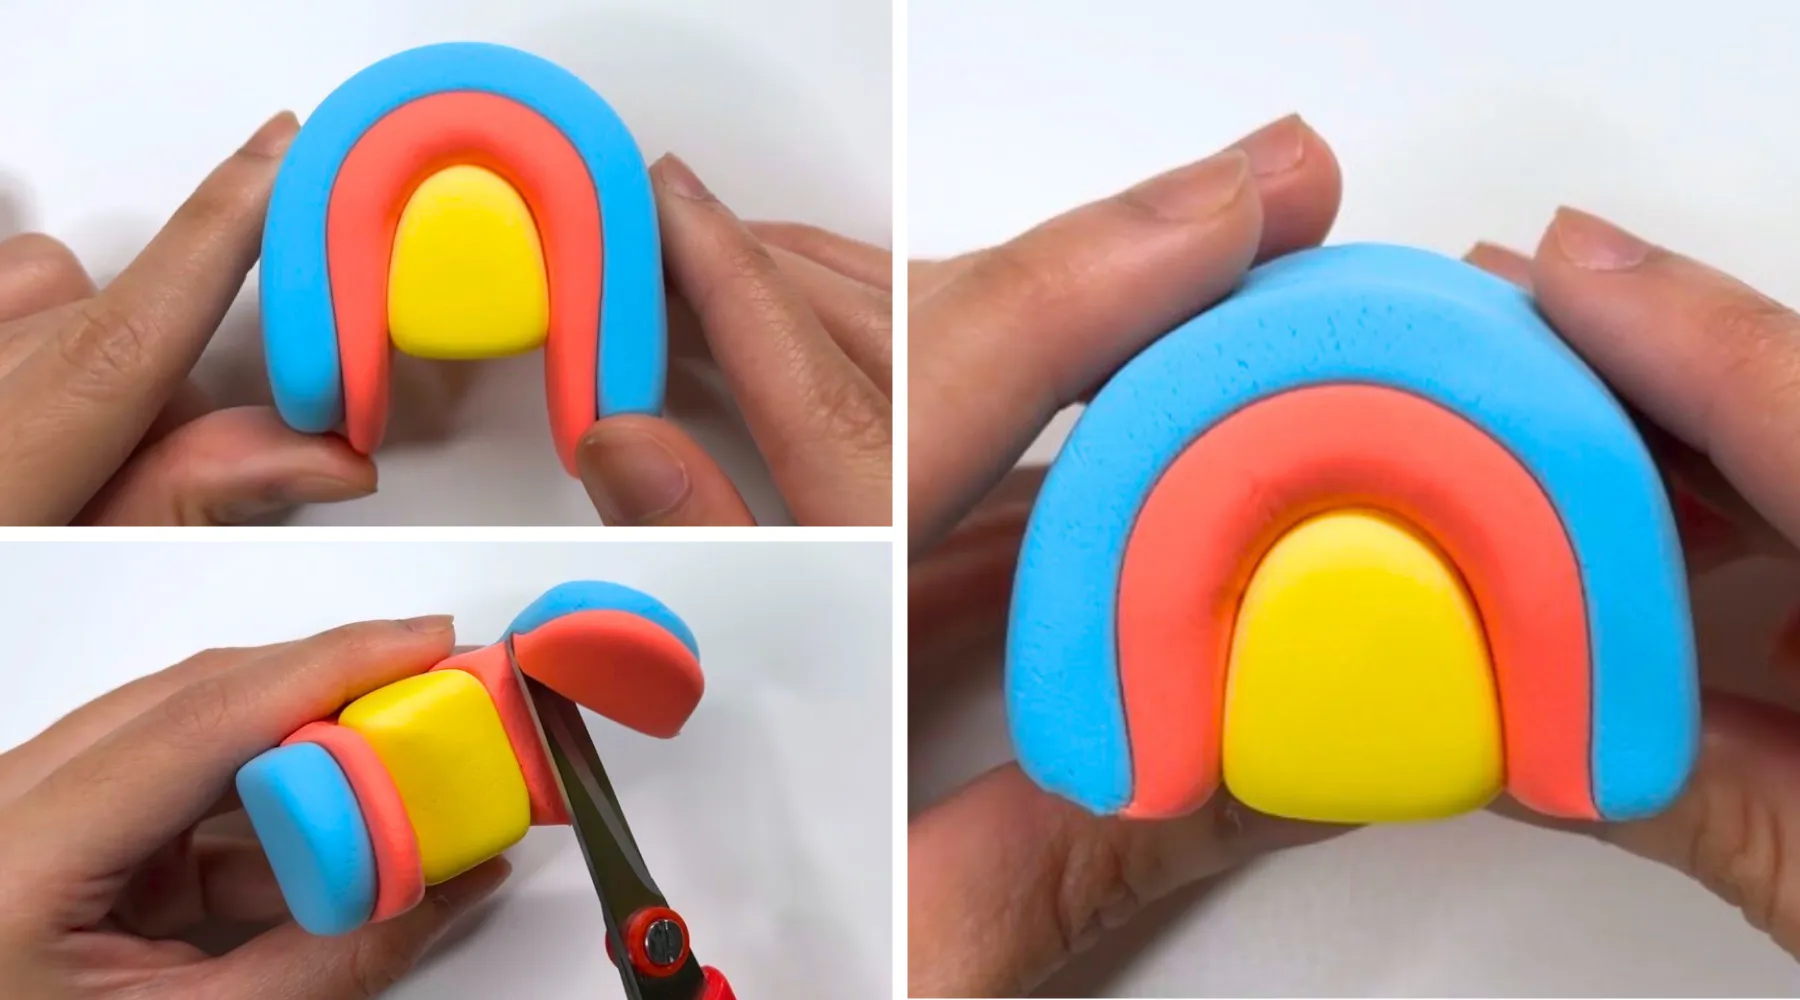
Step 6
Wrap the outer part of the rainbow around the rounded side of the yellow arch. Trim the excess clay with scissors.

Step 7
To make the stone, take one ball of white clay about the size of a ping pong ball, and add a smaller ball of gray clay – about half that size, and mix. DO NOT mix it completely, to create a marble effect.

Step 8
Make a flat disc shape using the marble clay and place the rainbow at the center. Reserve some marble clay for the rocks and chisel.
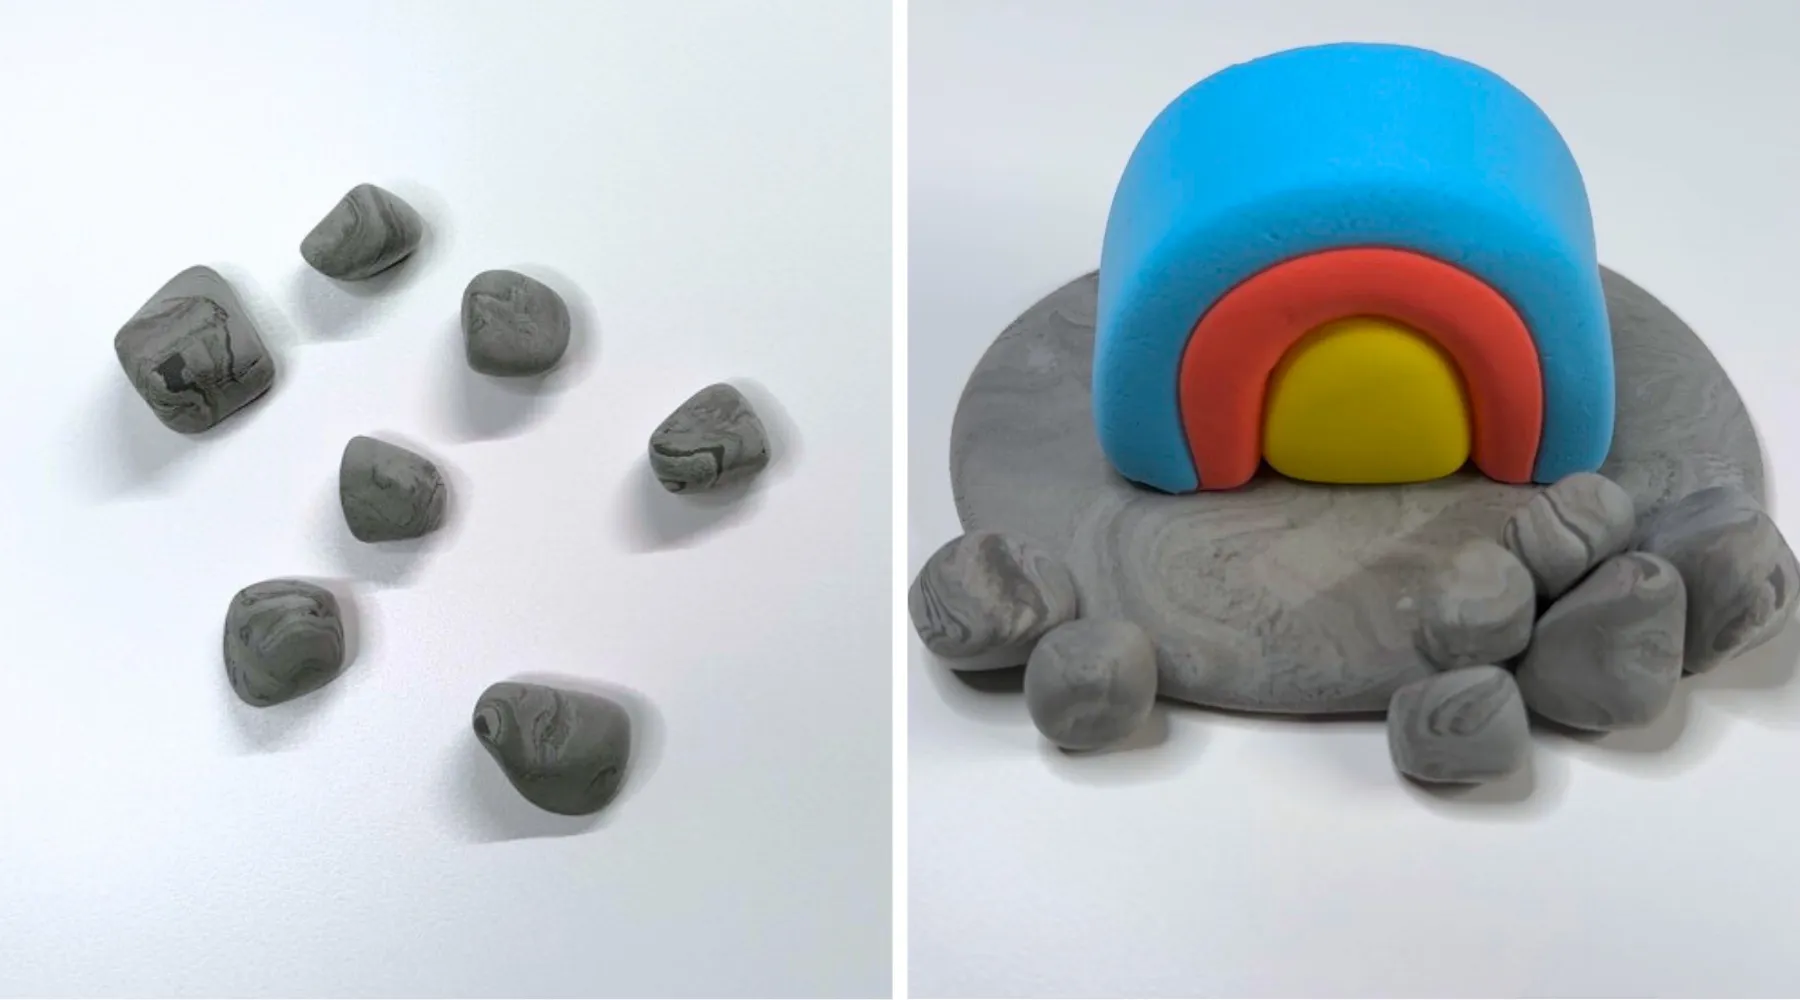
Step 9
Shape rocks using the marble clay by making a ball and pinching the sides irregularly. Attach them at the front of the stone, 2 on the left and 5 on the right.

Step 10
Make the chisel handle. Shape a small cylinder using the red clay. Use the side of the toothpick tool to press and create lines on the top and bottom of the cylinder.
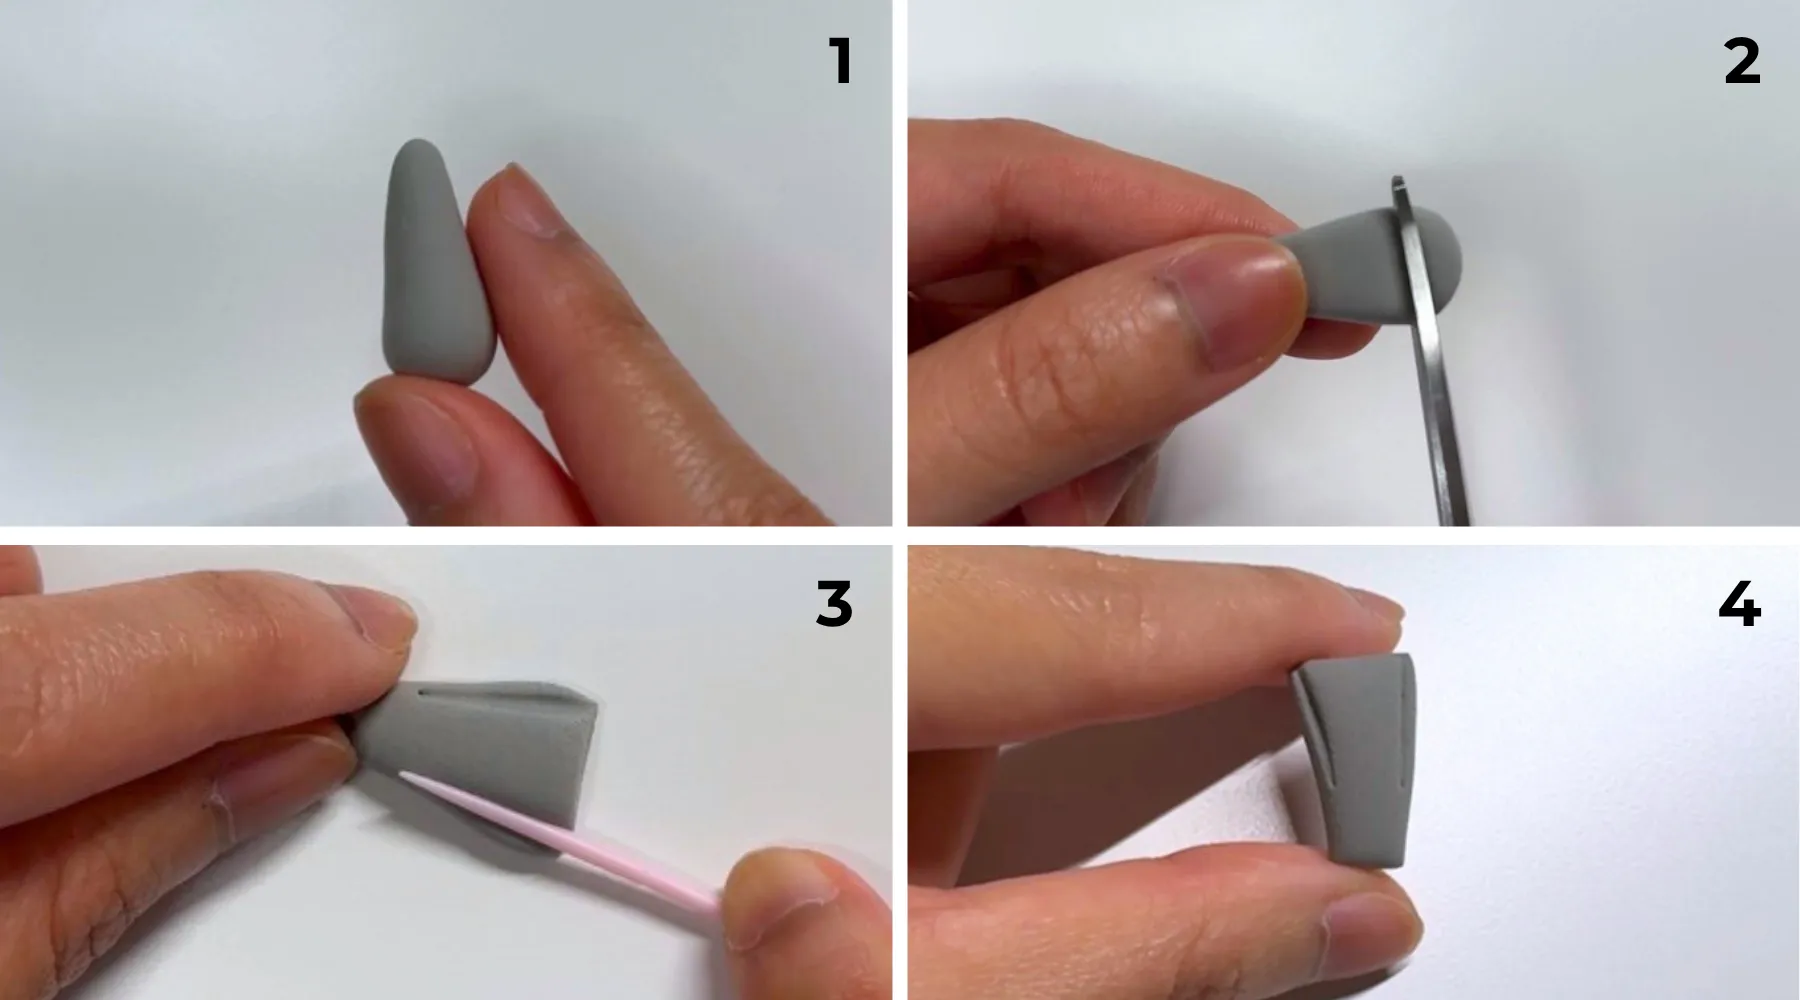
Step 11
Make the blade. Thoroughly mix the marble clay to create light gray. Shape a small teardrop using the clay and flatten it. Use scissors to trim off both ends to make it sharp. Use the side of the toothpick tool to create details on the sides to resemble the sharp part of the chisel

Step 12
Attach the blade on the handle with the narrow end on the handle.

Step 13
Make the hammer head. Shape a small cylinder using the blue clay.
Step 14
Make the handle. Make a thin string using the yellow clay. Use scissors to cut the right length for the hammer head and top of the hammer. Gently press both ends to create a cylinder.

Step 15
Attach the handles on opposite sides of the head. Make sure they are aligned when seen from the front.
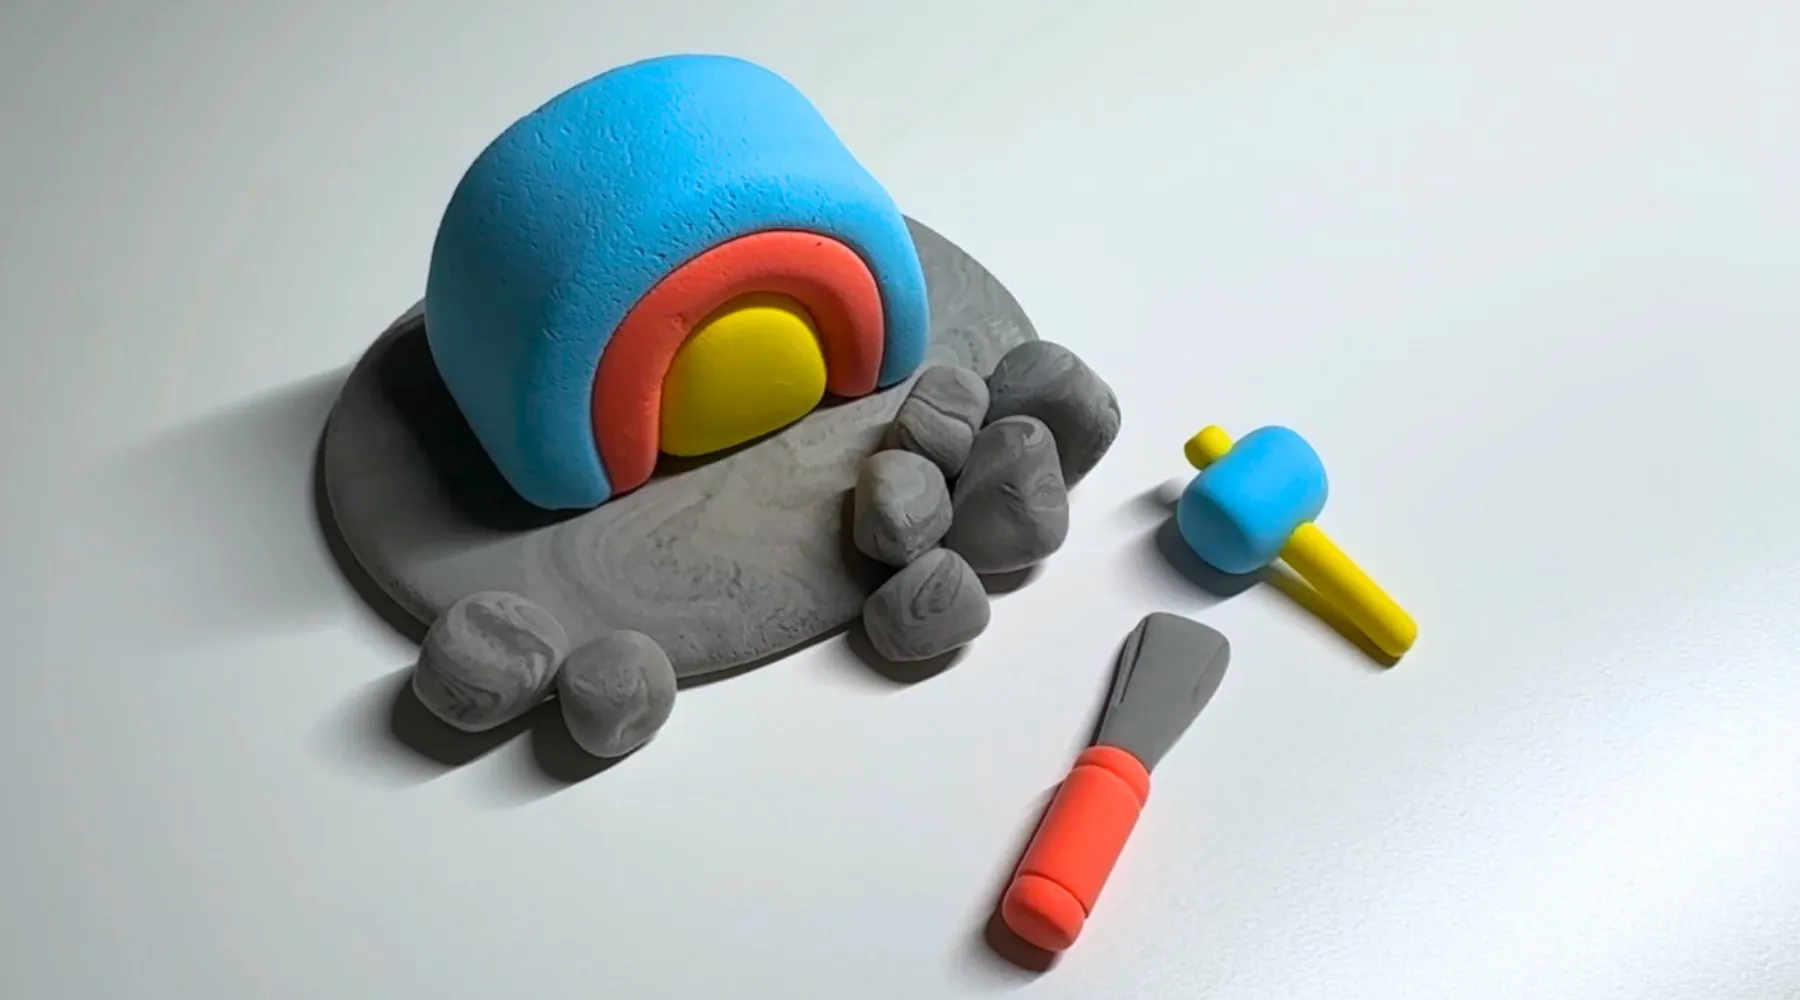
Step 16
Done!


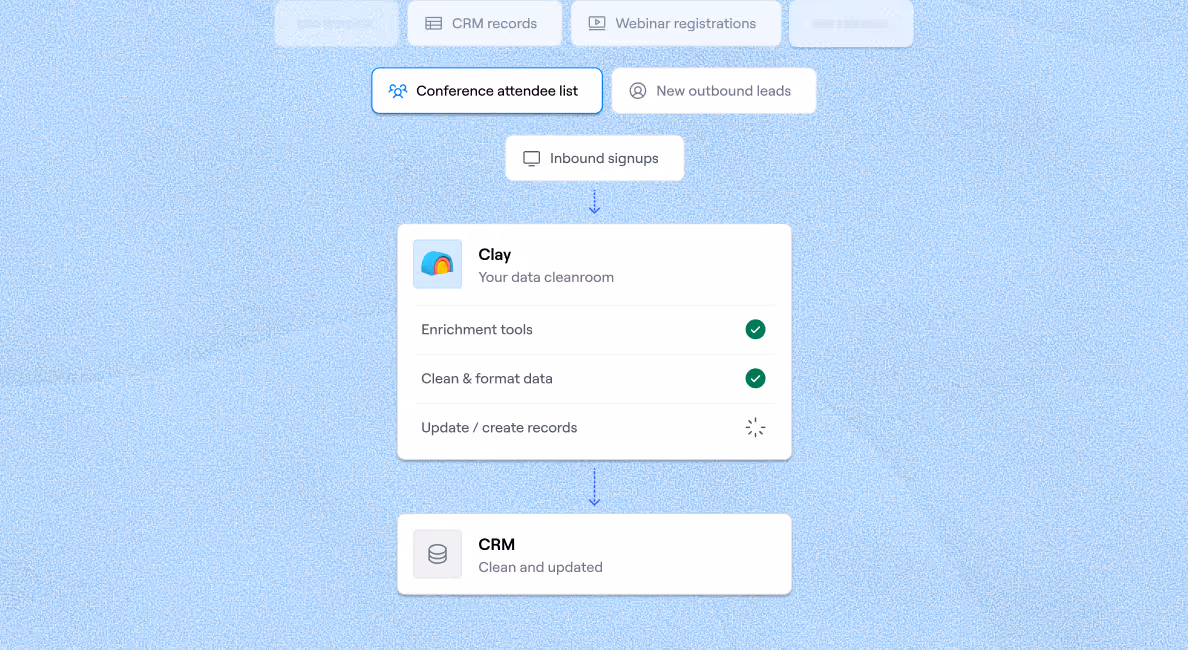
Features
The data enrichment layer and cleanroom for Salesforce

The data enrichment layer and cleanroom for HubSpot


Sync data to any database, sequencer, or CRM

Empower your SDRs to do more with less


.avif)


.avif)

.avif)

.avif)

.avif)

.avif)

.avif)