🔄 Importing Data from Your CRM: A Seamless Integration with Clay
Note: this lesson also appears in Clay 101 so feel free to skim or skip if you've already seen it somewhere else
In our journey to master data management and enrichment, we often find ourselves needing to import valuable information from our Customer Relationship Management (CRM) systems. At Clay, we've made this process intuitive and powerful, allowing you to leverage your existing data to fuel your prospecting and enrichment workflows.
🚪 Navigating the Sources Modal
When you're ready to import data, you'll want to navigate to our versatile Sources modal. Here, you'll find a well-organized selection of import options, neatly categorized into signals, companies, people, and custom sources. Whether you're working with Close, HubSpot, Salesforce, or any other major CRM, we've got you covered.

☁️ Salesforce Specifics
For Salesforce users, we offer two primary import methods: importing from a Salesforce list or a Salesforce report. It's worth noting that when importing from a Salesforce report, you'll encounter a cap of 2,000 records per report. This limitation isn't imposed by Clay, but rather by the Salesforce API itself. To circumvent this, we recommend importing directly from Salesforce lists whenever possible, as it allows for a more comprehensive data pull.
🎯 A Practical Example: Importing from HubSpot
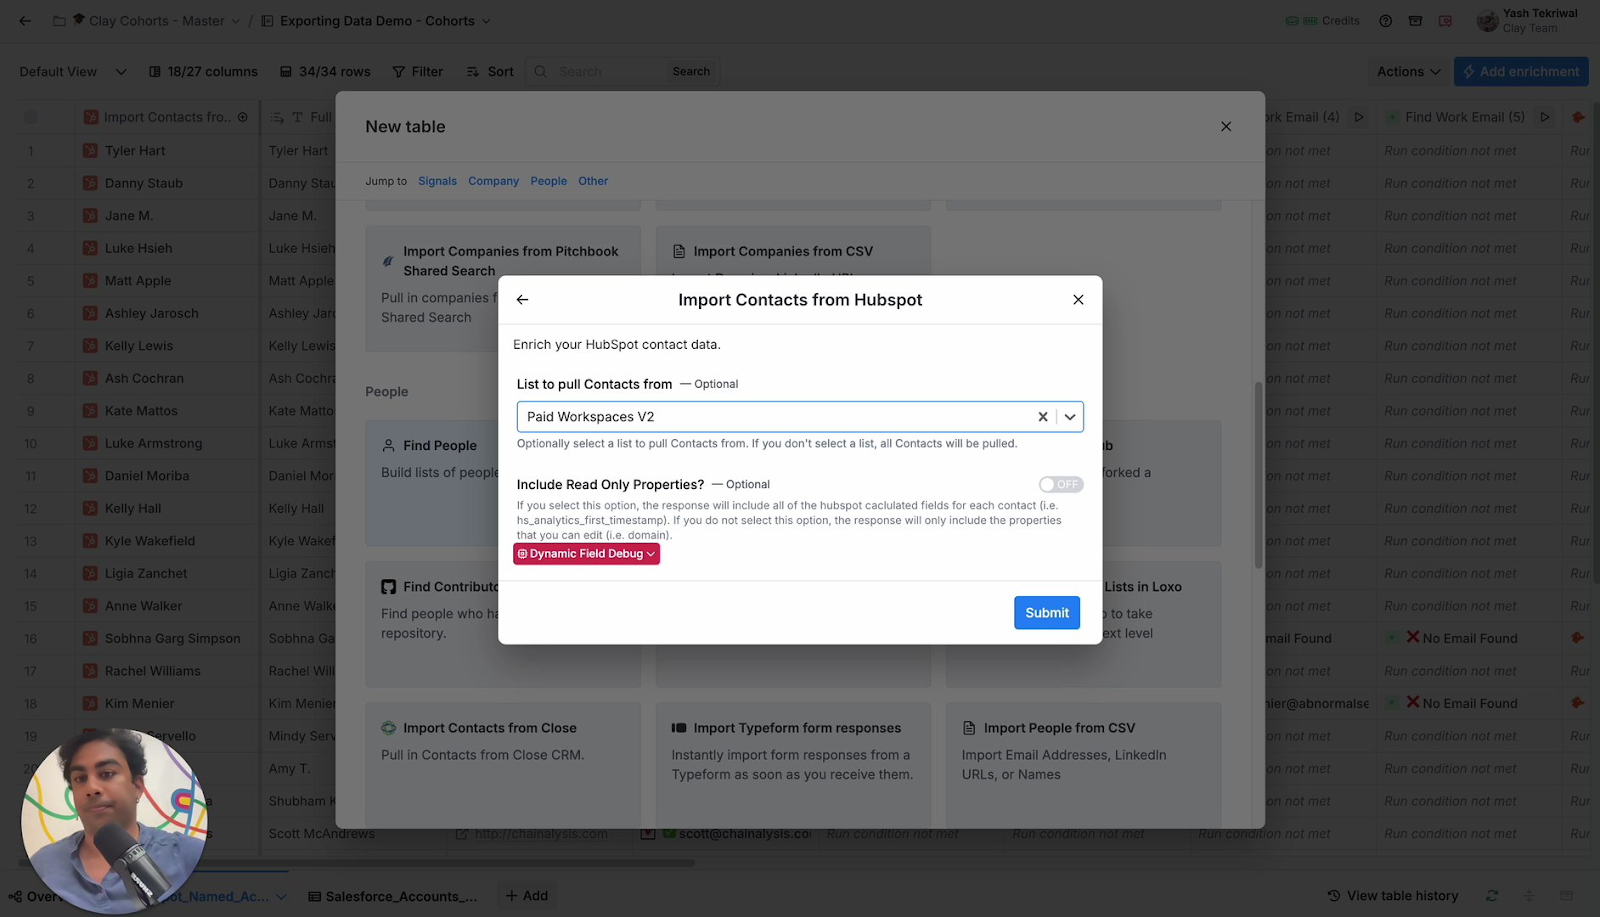
Let's walk through a practical example using HubSpot. Say we want to import a list of all our paid customers. We'd start by ensuring we have a pre-created list in HubSpot that contains only paid workspaces. Once we've confirmed the existence of this list, we can proceed to Clay's import function.
In the Clay interface, we'd select "Import contacts from HubSpot," authenticate with our account, and search for our desired list - in this case, "Paid Workspaces V2." Upon submission, Clay will populate the import preview with the available records. In our example, this yielded 460 contacts, though your numbers may vary depending on your specific data.

🔍 Customizing Your Data Import
One of the powerful features of Clay's import function is the ability to selectively choose which data fields to import. With access to over 370 properties from HubSpot, you can tailor your import to include precisely the information you need. For instance, you might choose to pull email addresses and company names for each contact.
🚀 Supercharging Your Data Strategy
By leveraging these CRM import capabilities, we're able to seamlessly bridge the gap between our existing customer data and the powerful enrichment and prospecting tools available in Clay. This integration forms a crucial first step in many of our data-driven workflows, setting the stage for more advanced operations like data enrichment, list building, and targeted outreach campaigns.
Remember, the key to effective data management is not just in the import itself, but in how you structure and utilize that data within your Clay workspace. Happy importing, and here's to supercharging your data-driven strategies!
Connect, explore and learn together
Read our GTM blog, or try out our top Claybooks and templates to transform your growth ideas into outreach in minutes.

Clay University
Master Clay in a few core lessons. Uplevel your data enrichment, craft better outbound messages, and book more meetings.

Go to market blog
Our best content on growing your GTM motion, from outbound sales automation to AI lead generation.

Integrations
Browse through all the integrations you can connect to Clay in seconds and discover what you can do!


Clay Experts
Hire a Clay Enterprise expert or find a Clay partner to help with your next project

Clay's Chrome extension
Clay’s Chrome Extension makes it wicked easy to find leads almost anywhere on the internet